Showing posts with label craft. Show all posts

Wednesday, October 08, 2014

Digital Printables, a new crafty adventure.

If you follow me on social media , Twitter, Pinterest, Instagram, or pop into my Etsy shop or follow me here on the blog, you will know that although I love sewing and that is mostly what you will find in my Etsy shop, I also love all kinds of crafts and crafty things.

With this thought in mind I have been expanding the range of items available in my Etsy shop, you might remember here , I was creating sewing patterns , still available to purchase in my Etsy shop, I also have been enjoying creating jewellery with these fabric pendants.

Following on from the pendants I have been getting crafty on the computer and creating my own digital printables that can be used in creating pendants, bottle cap jewellery, magnets, key rings and scrapbooking to name but a few.

I have been having great fun with these graphics programmes Inkscape and Gimp both of which are free powerful graphics programmes, although I admit what I can do in Gimp is limited and I do find Inkscape easier to use. Using both of these programmes I have created two digital printable PDF files available to purchase in my Etsy shop, both of which contain 1 inch round printable images.

The digital printable sheets both have a different theme, and yes you guessed it, the first one is sewing themed and here it is , but please note the online pictures are a low resolution to prevent theft.
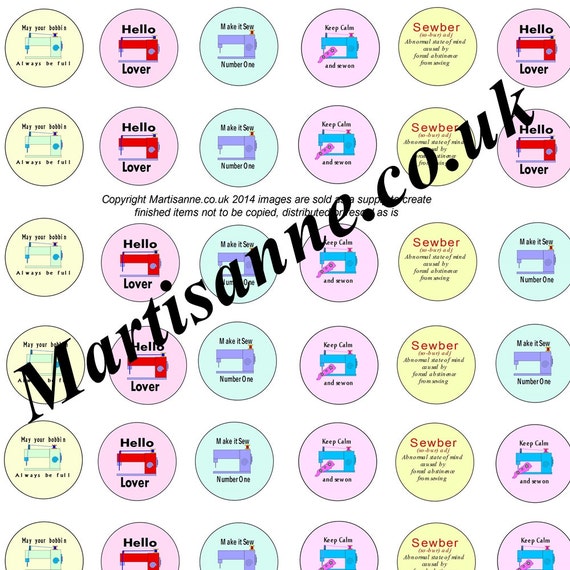
 
You can purchase this collage sheet for personal and commercial use.


And the other pdf I have been working on is a different theme altogether, it contains , original art paintings , hand painted by myself, a cat, a giraffe and lovers kissing at sunset, and you might recognise the fourth picture , you may have met him somewhere before , possibly here.
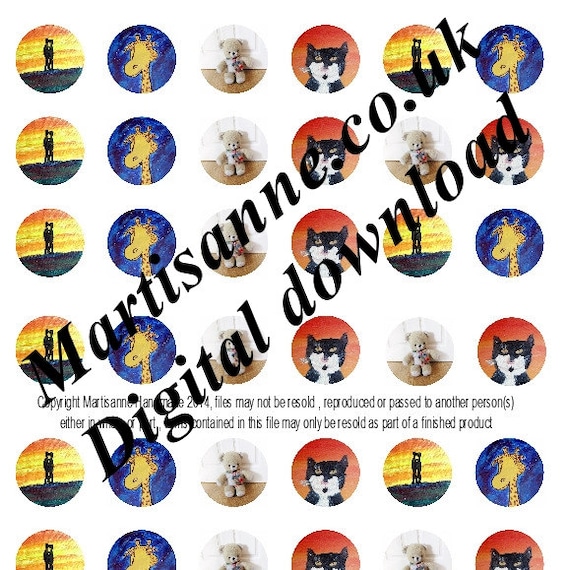
 
You can purchase this collage sheet again for personal and commercial use.
 
 
As you can see two totally different styles of art , one computer created the other created by hand and computer , but both resulting in similar but very different products.
I am really pleased with how these collage sheets have turned out, I am not a graphic designer by trade or training, the skills I have are all self taught, just one of the many things owning an Etsy shop has taught me.
 
I look forward to creating more digital art for my Etsy shop, along with sewing patterns and maybe some crafty tutorials, you never know you might even see some of my crochet popping up in my shop.


Tuesday, June 17, 2014

Exciting new handmade creations and custom orders

Recently I have been looking at my Etsy shop again and looking to see where I can improve sales, and after doing this numerous times of doing tis and revamping the conclusion I have come to is I need to offer items that are as individual as the customer that is going to buy them.

I have been looking at new product ranges to give me that usp ( Unique selling point).

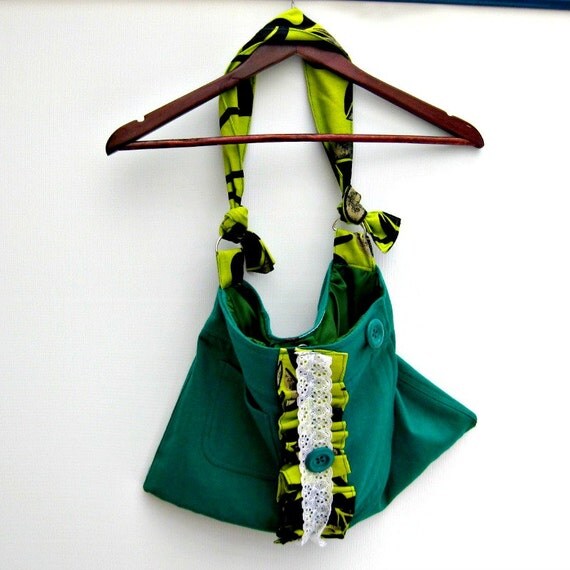
I generally used recycled fabrics to create items such as the bag below, that in itself is a little different but not truly unique


The first of these developments has been sewing patterns, I create my own when creating items for my shop, so partly as a record for me and in order to offer other people the opportunity to have a go at creating lovely items for themselves.

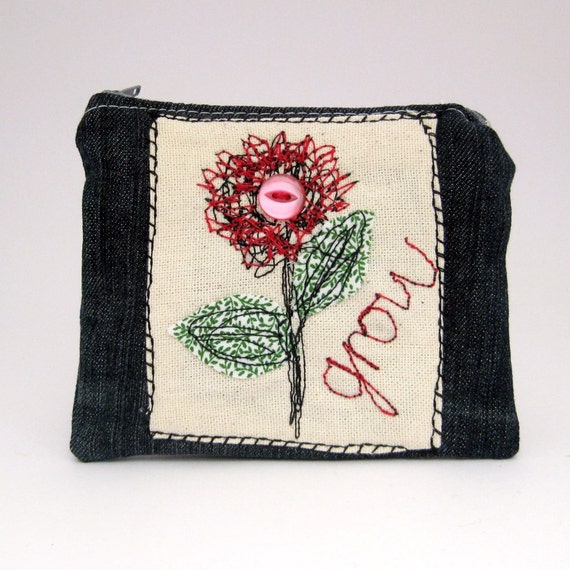
The second development for the shop is free motion embroidery items, now these are unique as I am drawing with the sewing machine, this in itself creates a unique product such as this purse.

Now that is unique enough I hear you say, well for me no, I always want to go that one step further, and thanks to a couple of enquiries regarding a product in my Etsy shop, I have decided to start offering custom orders, the custom orders option is now enabled in my Etsy shop .

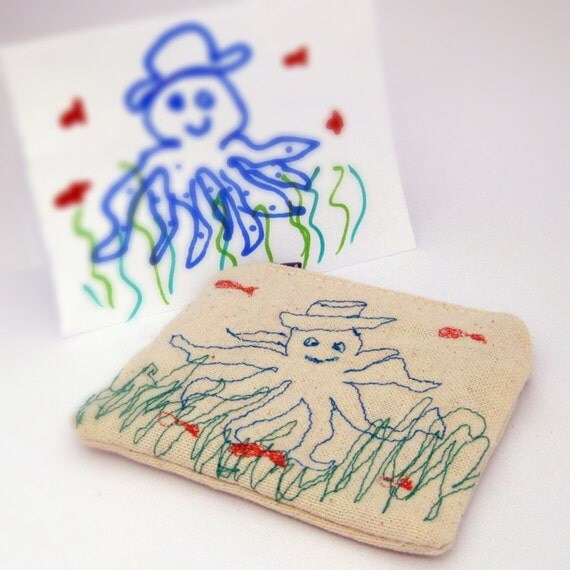
Here is the item that inspired the questions


A free motion embroidered octopus on a zip pouch, the drawing behind it is actually a quick sketch with a Sharpie that I did before embroidering the purse with the octopus design.
The questions I have been asked is can I do an embroidered purse from a child's picture, now this is truly a unique item, so in the next few weeks I will be setting up a custom listing for this purpose in my Etsy shop .
All designs will remain the property of the customer and will not be reproduced or used for advertising purposes without express agreement between you the customer and Martisanne Handmade.


Tuesday, June 03, 2014

A new member of the sewing team

You can see a picture of my sewing/crafting room in the sidebar, but here is a picture of where all the Martisanne Handmade Creations are made just in case you missed it.

Doesn't it look tidy ? , I can assure you at this present moment in time, it certainly does not look like this , sewers and crafty people are messy people it is in our nature , why get one fabric out when you can get out ten and ribbon and buttons and lace to go with it.

You can see the team there on the desk a Janome sewing machine and overlocker, which work just fine.
Recently though I have been doing a lot of free motion embroidery and sometimes finding with some thicker fabrics my Janome has struggled a little it is after all a domestic sewing machine not an industrial.
Another bugbear of mine was swapping from the darning foot to the standard foot, the darning foot is not clip on like the others but screw in, not difficult but when you just want to get on and create an extra step you could just do without.
So to counter these issues , meet the new member of the team "Jones"


Jones is an early birthday present from my husband, the plan is to leave one machine set up for embroidery the other for standard sewing.

It is not my birthday yet but I have been having a play with Jones and after initial hiccups and frustration of not threading him properly due to a lack of manual we are up and running.
I would say by the speed and power that Jones sews,  he is semi industrial , certainly weighs a tonne, I have Googled various Jones sewing machine images and not found one the same, and I cannot find a model number anywhere on the machine, I have looked underneath round the back, down the side , can anyone help me out ?, do you have one of these or have had one of these and know the model number, I would love to hear from you if you do.

Well toodlepip for now Jones and I are off to get up to some creative craftyness

Tuesday, May 13, 2014

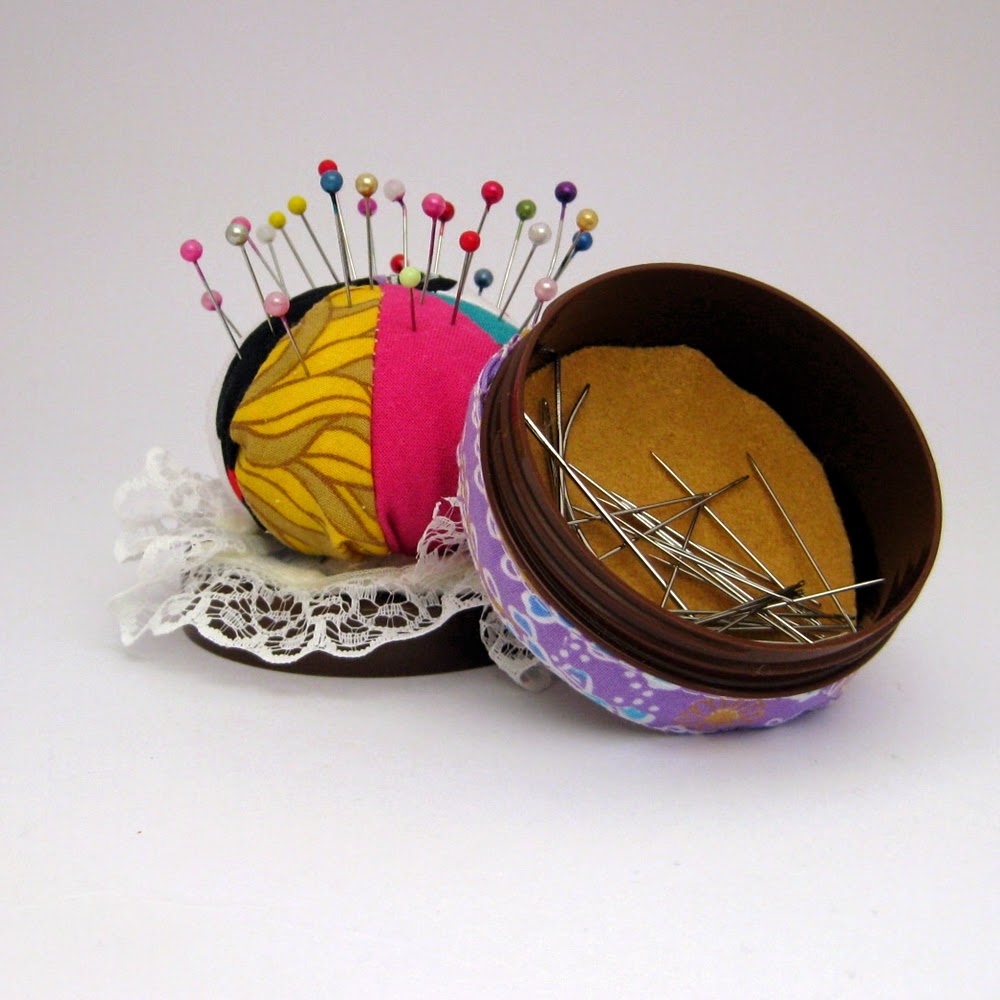
How to make your own pin cushion from a face cream pot

I have a nasty habit of leaving sewing pins and needles lying about in my office then moan that I can't find anything, so when one of my face creams ran out this week leaving me with a cute little plastic pot that I loathe to throw out , this got me thinking and the pincushion and storage pot for my needles came about.


To make a similar pin cushion you will need the following

Scissors
Paper
Pencil/pen
Empty plastic pot
Scraps of fabric 
Scraps of felt
lace trim (optional)
Scraps of quilt wadding or cushion stuffing (cheap option buy a really cheap cushion pad and use stuffing)
Hot glue gun


Gather your supplies and give your pot a good clean out and dry it, my pot was pre clean out , I was just loving the coconut smell at that point.


Use your pot base and lid to draw round and cut two pieces of felt in a circle , one for the base (mine was yellow) and one for the top, I used white for mine.


Put these felt circles to one side for the time being.

Next measure the diameter of your pot lid mine was (7cms).
For those that left  school a long time ago like me, the diameter is the measurement from one side of the circle to the other crossing the centre point.

You now need to draw a circle on your paper that is approximately 2 1/2 times the diameter of your pot lid, you can use a compass or like me you couldn't find it , I used a plate to draw around.


Cut your paper circle out


Yep my paper looks greasy, I used a bit the kids had grabbed with crisp fingers , waste not want not.

Fold your cut out circle in half, half again and half again , I have drawn on this one to show you where your fold lines will be, your circle will be divided into eight equal sections.


Fold your paper circle up again and use it as a template to cut out eight fabric shapes
Use different fabrics .


Now place one fabric piece on top of the other right sides facing and sew along the straight edge using a 1/4 inch seam allowance.


Carry on  and do this for all eight fabric circle segments and you will end up with a circle with a gap this is fine.


Next sew your two open edges together again right sides facing 1/4 inch seam allowance and sew slightly past the centre to make sure you have no hole in the centre, your fabric circle will be domed a bit like a bra cup, this is all good.


Turn your fabric circle over wrong side facing you and grab a needle and thread and sew a running stitch all the way around the outside.

Pull on one end of your stitches and gather it all together but leave a gap because we still need to add the stuffing.


Grab your quilt wadding or toy stuffing and stuff it in the gap to poof out your fabric circle, you want it quite firm so get as much in as you can.


When you have stuffed as much as you can, pull your threads tight and knot together trapping your stuffing in there.


I sewed a strip of lace edging around my felt circle for the pot lid , this is up to you if you want to add it or not.


Now grab your hot glue gun


And glue your felt circle for the lid and glue it down to the pot lid.
And glue your poofy stuffed circle of fabrics on top of the felt , gathered side down , press hard , you want it to sort of mushroom out a bit.


Glue your felt circle for your pot bottom into the bottom of your pot, sorry I forgot to take a shot of this .


I also glued a strip around the edge of my pot bottom from bias binding to jazz it up a bit, and there you have it a pincushion and sewing needle pot combo.


I hope you enjoyed this tutorial , if you enjoyed this you will love my sewing tutorials in my Etsy shop, if you can't be bothered making a purse, or bag or zip pouch and would like someone else to do all the hard work , I got that covered too, you can buy premade fabric gifts 

See you all soon .


Monday, April 28, 2014

Sewing patterns and sewing tutorials in my Etsy shop

I mentioned  previously that I was starting a new range of products at Martisanne Handmade, a range of downloadable sewing patterns.

Well I have been working on those, they are not an easy option , they take time , coming up with the design, trying it out to find the best measurements, the best way to construct the item and then after all that there is the photograph taking, the note making and the final write up of instructions and digitizing the actual pattern pieces.

As you can see a lot of hard work goes into one little inoffensive looking sewing pattern.

So why do I do it, why create sewing patterns , there are a number of reasons and this is by no means an exhaustive list, so here are 6 of my best.

1. The most obvious , so that I can sell them, I am a business and would  very much like one day to make a        profit.

2. I love sewing and would like to share that love for sewing with others in a non scary easy to follow way.

3. I mentioned I love sewing, yep I think you got that , but what I don't love sewing the same thing over and
    over.

4. I love creating new things, working out a new idea for a product this is time consuming, creating patterns
    is a way to make that time an investment.

5. I mentioned I need to create new products not just the same old same old, but when I have created them
    what do I do with the measurements I have on a scrappy bit of paper , my head isn't big enough to
    store them all so sewing patterns are a great way to force myself into a filing system

6. About those scrappy bits of paper, I also can't remember where I stuffed them so 5b really.

7. The real number 6 , I also love learning new skills ,in  creating these sewing patterns I taught myself to           digitize sewing patterns using Inkscape , so yay a new skill under the belt .

So as you can see they may be time consuming, but there is a lot of benefit to be had from creating these little sewing patterns, and I will remind myself of this next time I am on page 15 writing a sewing pattern and I feel like my eyeballs are falling out.

I will leave you with a snap shot of my Etsy shop , with the sewing patterns already available, remember they are instant download so no postage fees and no waiting for them to arrive so instant gratification.


LinkWithin

Related Posts Plugin for WordPress, Blogger...