Showing posts with label womens accessories. Show all posts

Tuesday, September 17, 2013

What have I been sewing now ?

With the house elves safely settled back into school , I have had a little bit of time this week to get creating for my shop, if you follow me on Twitter you might have noticed me jumping up and down announcing opening a new shop, so there are now two places you can purchase Martisanne handmade goodies, you can click on the tabs at the top of the screen to be transported to my Etsy shop as before, but look there is a new tab for my new shop my Zibbet shop yay twice the handmade fun.

Some of the items available to purchase in My Etsy store are also available to buy in my Zibbet store , but there a couple of new goodies that I have been sewing this week that are only available in my Zibbet store so far .

A few weeks back I purchased a length of gorgeous satin feel balloon print fabric that just screamed celebrations, birthdays, Christmas PARTY TIME !!!
I just couldn't make up my mind what to do with it, but with the school holidays over with I started thinking about Christmas, I know I know but us crafters always have to be one step ahead of you buyers you know.
So I decided to create these little money wallets/gift card holders, a gift card just fits snugly inside , perfect for any gift giving and here they are

Fabric gift card holder
Handmade gift card holders

Gift card wallet
Gift card wallet

You can purchase them in my Zibbet shop

Also around the same time I purchased the balloon fabric, I also bought three beautiful lightweight fabrics in shades of blue and purple, they all looked so
pretty together I bought all three, and have waited as to what to do with them , as I have so many ideas for new designs I couldn't decide what to do with them, to procrastinate or not to procrastinate, so I just got on with it and put them all together in a pretty patchwork cosmetics purses.
The lovely little crochet bonnets on them I had already just waiting for the right project and I think this is it

Cosmetics bag purple patchwork
Available to purchase in my Zibbet shop
Fabric cosmetics bag patchwork
Cosmetics pouch purple patchwork
 
Again this is available to purchase in my Zibbet shop

I am off for more procrastination now perhaps a little sewing thrown in, have a great week and pop back next Tuesday to see what I have been up to.

Tuesday, September 03, 2013

How to make a DIY jewellery organiser for next to nothing

Following on from my cherub hunting for the soon to be new theme in the Martisanne bedroom, I have been pondering for a while the problem of my jewellery and this really falls into two parts, I need it displayed so I can easily see what I have and secondly I need it stored in such a way as it does not take up more surface space, so I started googling and came across this awesome idea here so I set about making an earring display myself.
Being a bit of a hoarder it did not take long to source the required items, I had a large pine picture frame that had long since lost it's glass and plenty of leftover chicken wire from making our chicken run, my trusty silver spray paint and every diyers staple a heavy duty staple gun (lame joke I know).

First place your picture frame over your chicken wire and cut your chicken wire just slightly larger than your frame to allow room for stapling, I used wire cutters for cutting the chicken wire.


Jewellery organiser supplies

Now staple your chicken wire to the back of your frame ,using a heavy duty staple gun taking care to ensure the wire is stretched tight and not baggy

Diy jewellery organiser
Staple wire to the frame

Now clip off the excess chicken wire carefully with your wire cutters so that it does not show at the front of your frame

Clipping excess wire from frame

I wanted my jewellery organiser silver so I sprayed it with my silver spray paint

Diy jewellery organiser painting
Painting the diy jewellery organiser

And here you have it , a brilliant way to organise and display your earrings, just hang them off the wire, as I mentioned previously I can't take credit for the idea I originally found it here but wanted to share my making of my own earring display, jewellery organiser.

Finished jewellery organiser


Tuesday, July 09, 2013

How to make fabric covered buttons tutorial

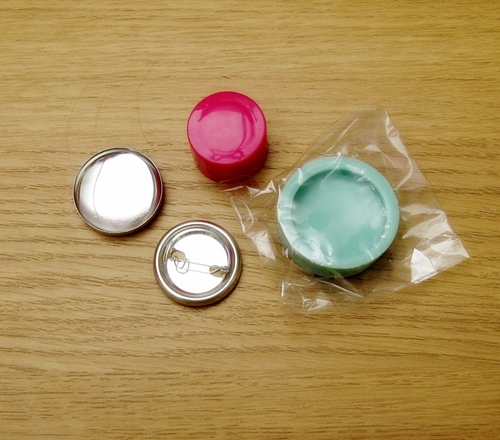
Last weekend we had a little wander through our local car boot sale and found this

Fabric covered buttoons set
Fabric covered buttons set

I was chuffed to tiny pieces, I have never tinkered with fabric covered buttons before, so I thought I would share with you the how to, and also I have a real brooch making thang going on at the moment, so the buttons came along at just the right time.

What you will need is the following

Fabric to cover your button
Button, this comes in 2 parts front and back
Button covering tool , again 2 parts , a cup like piece and a smaller presser type piece
Scissors
Pen or pencil

Fabric covered buttons supplies


First grab your scrap of fabric and your button top, this is the slightly domed piece of the button, you want to place this on your fabric, wrong side of the fabric facing up, and draw around the button leaving a good seam allowance around, for example my button was 1 inch in diameter and my circle was 2 inches in diameter.
Cut the circle of fabric out.

Fabric covered buttons preparation

Now place your fabric centrally right side facing down inside the larger cup part of the covering tool as shown below

Fabric covered buttons tutorial

And place your button front dome side facing down on top of the fabric, you can see there is enough fabric to tuck inside the button

How to make fabric covered buttons

Tuck the fabric toward centre and place your button back on top, pin side facing up


Sorry the next bit was too tricky to photograph as I was on my own and needed both hands. Use the other part of the covering tool to force the back down onto the front of the button, you may need to press quite hard and will feel a bit of a pop when they are together.
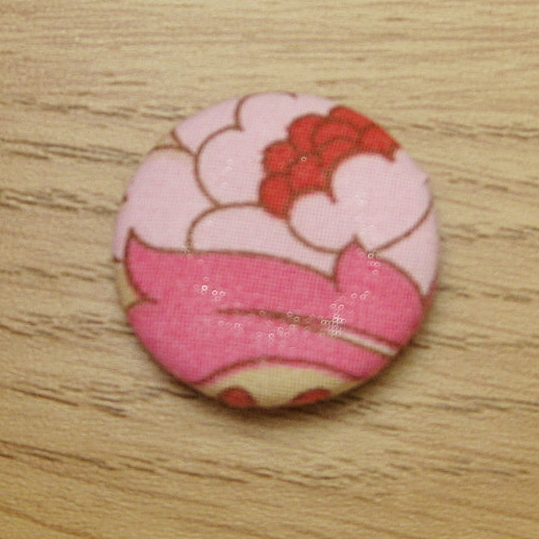
And there you have it one covered button

Finished fabric covered button

And for the observant among you, my button covering tool does not possess magical fabric altering qualities, nor is it a mini time machine leaping through space and time, I forgot to photograph the finished button before I used it so photographed another for you to see the end result.

As you can see below I have gone a bit mad with the covered buttons and have been making beautiful Summer brooches for my Etsy shop,take a look what do you think ?
Handmade fabric flower brooches


You can have a look at my other handmade goodies available to buy by looking in my Etsy shop


LinkWithin

Related Posts Plugin for WordPress, Blogger...