Tuesday, May 13, 2014

How to make your own pin cushion from a face cream pot

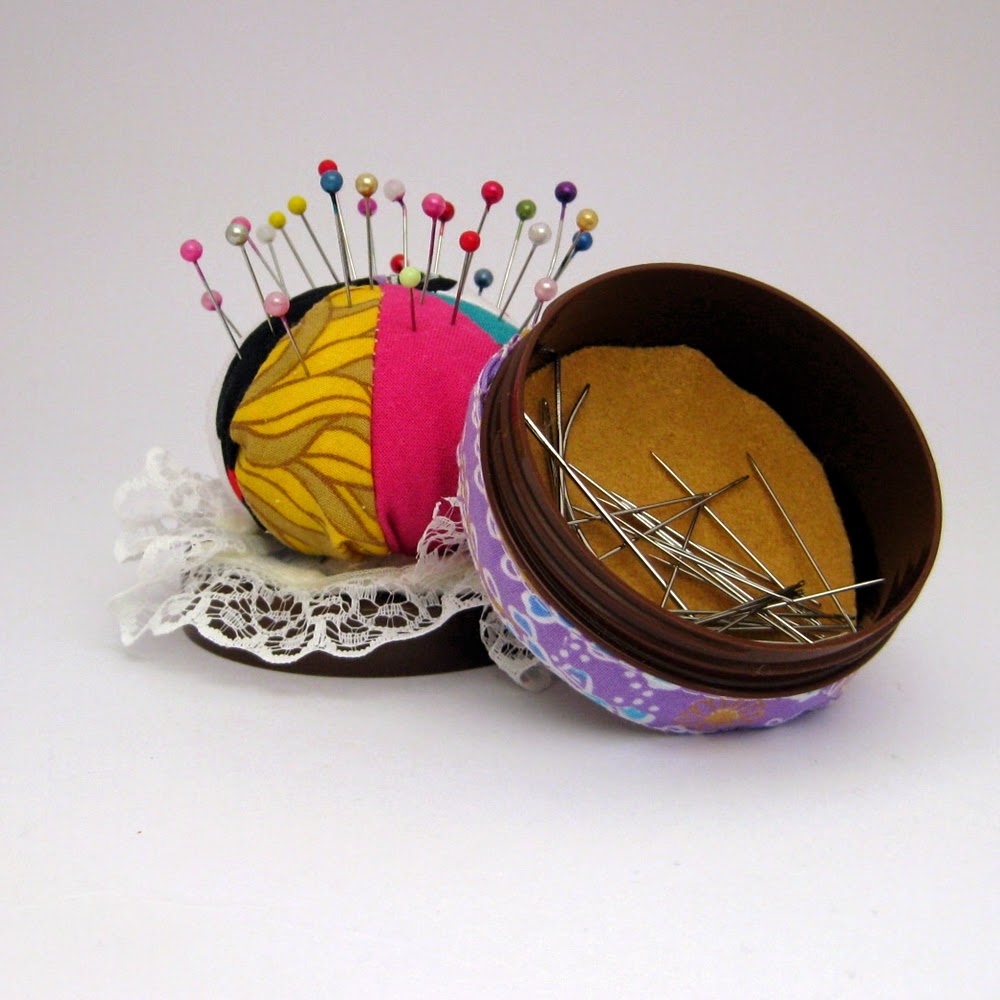
I have a nasty habit of leaving sewing pins and needles lying about in my office then moan that I can't find anything, so when one of my face creams ran out this week leaving me with a cute little plastic pot that I loathe to throw out , this got me thinking and the pincushion and storage pot for my needles came about.


To make a similar pin cushion you will need the following

Scissors
Paper
Pencil/pen
Empty plastic pot
Scraps of fabric 
Scraps of felt
lace trim (optional)
Scraps of quilt wadding or cushion stuffing (cheap option buy a really cheap cushion pad and use stuffing)
Hot glue gun


Gather your supplies and give your pot a good clean out and dry it, my pot was pre clean out , I was just loving the coconut smell at that point.


Use your pot base and lid to draw round and cut two pieces of felt in a circle , one for the base (mine was yellow) and one for the top, I used white for mine.


Put these felt circles to one side for the time being.

Next measure the diameter of your pot lid mine was (7cms).
For those that left  school a long time ago like me, the diameter is the measurement from one side of the circle to the other crossing the centre point.

You now need to draw a circle on your paper that is approximately 2 1/2 times the diameter of your pot lid, you can use a compass or like me you couldn't find it , I used a plate to draw around.


Cut your paper circle out


Yep my paper looks greasy, I used a bit the kids had grabbed with crisp fingers , waste not want not.

Fold your cut out circle in half, half again and half again , I have drawn on this one to show you where your fold lines will be, your circle will be divided into eight equal sections.


Fold your paper circle up again and use it as a template to cut out eight fabric shapes
Use different fabrics .


Now place one fabric piece on top of the other right sides facing and sew along the straight edge using a 1/4 inch seam allowance.


Carry on  and do this for all eight fabric circle segments and you will end up with a circle with a gap this is fine.


Next sew your two open edges together again right sides facing 1/4 inch seam allowance and sew slightly past the centre to make sure you have no hole in the centre, your fabric circle will be domed a bit like a bra cup, this is all good.


Turn your fabric circle over wrong side facing you and grab a needle and thread and sew a running stitch all the way around the outside.

Pull on one end of your stitches and gather it all together but leave a gap because we still need to add the stuffing.


Grab your quilt wadding or toy stuffing and stuff it in the gap to poof out your fabric circle, you want it quite firm so get as much in as you can.


When you have stuffed as much as you can, pull your threads tight and knot together trapping your stuffing in there.


I sewed a strip of lace edging around my felt circle for the pot lid , this is up to you if you want to add it or not.


Now grab your hot glue gun


And glue your felt circle for the lid and glue it down to the pot lid.
And glue your poofy stuffed circle of fabrics on top of the felt , gathered side down , press hard , you want it to sort of mushroom out a bit.


Glue your felt circle for your pot bottom into the bottom of your pot, sorry I forgot to take a shot of this .


I also glued a strip around the edge of my pot bottom from bias binding to jazz it up a bit, and there you have it a pincushion and sewing needle pot combo.


I hope you enjoyed this tutorial , if you enjoyed this you will love my sewing tutorials in my Etsy shop, if you can't be bothered making a purse, or bag or zip pouch and would like someone else to do all the hard work , I got that covered too, you can buy premade fabric gifts 

See you all soon .


Monday, April 28, 2014

Sewing patterns and sewing tutorials in my Etsy shop

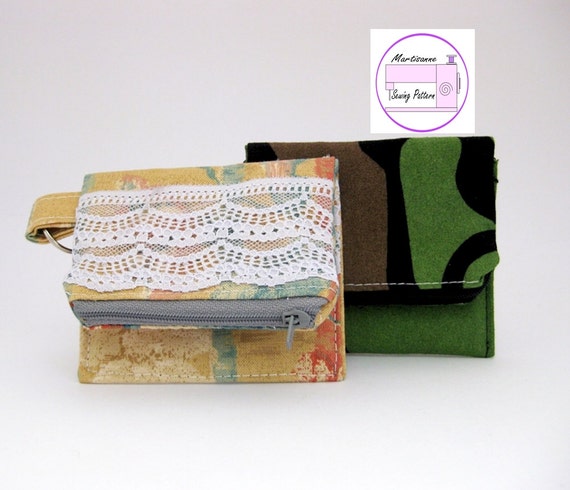
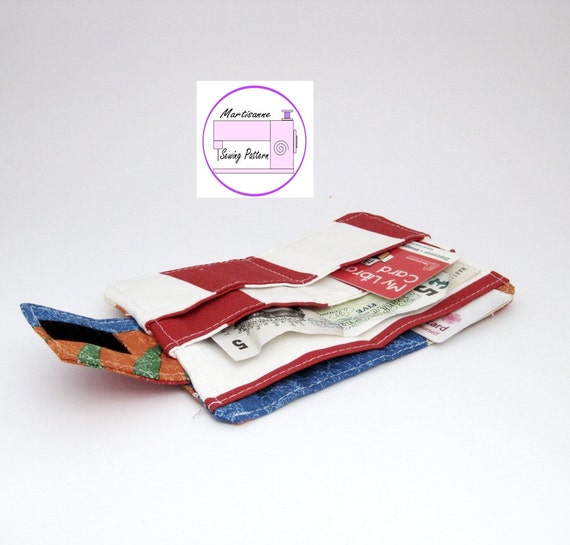
I mentioned  previously that I was starting a new range of products at Martisanne Handmade, a range of downloadable sewing patterns.

Well I have been working on those, they are not an easy option , they take time , coming up with the design, trying it out to find the best measurements, the best way to construct the item and then after all that there is the photograph taking, the note making and the final write up of instructions and digitizing the actual pattern pieces.

As you can see a lot of hard work goes into one little inoffensive looking sewing pattern.

So why do I do it, why create sewing patterns , there are a number of reasons and this is by no means an exhaustive list, so here are 6 of my best.

1. The most obvious , so that I can sell them, I am a business and would  very much like one day to make a        profit.

2. I love sewing and would like to share that love for sewing with others in a non scary easy to follow way.

3. I mentioned I love sewing, yep I think you got that , but what I don't love sewing the same thing over and
    over.

4. I love creating new things, working out a new idea for a product this is time consuming, creating patterns
    is a way to make that time an investment.

5. I mentioned I need to create new products not just the same old same old, but when I have created them
    what do I do with the measurements I have on a scrappy bit of paper , my head isn't big enough to
    store them all so sewing patterns are a great way to force myself into a filing system

6. About those scrappy bits of paper, I also can't remember where I stuffed them so 5b really.

7. The real number 6 , I also love learning new skills ,in  creating these sewing patterns I taught myself to           digitize sewing patterns using Inkscape , so yay a new skill under the belt .

So as you can see they may be time consuming, but there is a lot of benefit to be had from creating these little sewing patterns, and I will remind myself of this next time I am on page 15 writing a sewing pattern and I feel like my eyeballs are falling out.

I will leave you with a snap shot of my Etsy shop , with the sewing patterns already available, remember they are instant download so no postage fees and no waiting for them to arrive so instant gratification.


Tuesday, April 15, 2014

Upcycling clothes, a sweatshirt to a little girls dress tutorial

Whilst browsing a local charity shop a few weeks ago , I came across a "Daisy Duck" sweatshirt for 25p , perfect for my little girl except that it was an age 11 yrs not age 5 yrs. Not wanting this bargain to get away I bought it anyway and set about upcycling it from a lovely sweatshirt to a little girls dress.
Here is the tutorial on how I did it to give you ideas on how you too can upcycle clothes easily and cheaply.


First grab your sweatshirt 


Use your seam ripper to de-tatch the sleeves 


Next grab your child that the dress needs to fit and place the de-armed sweatshirt over their head inside out as though it were a dress already.

Carefully place pins along one side of the sweatshirt to pin the sides of the sweatshirt to narrow them where neccessary to create a dress shape rather than a sack , also pin the armhole to create a smaller gap but make sure your child can still comfortably get their arm in and out of the armhole.
You may need to take the armholes in as well but I didn't need to for mine. If you need to use the same principle as for the dress sides pin in place but allow an extra 1/4 inch seam allowance for hemming the armholes. 
Either cover your hands over the pins to prevent them sticking in the child when you remove the sweatshirt or draw a line where your pins are and remove them first.
Ignore my drawn line below I changed my mind on the sizing before sewing.


Fold your sweatshirt down the middle and trace your dress shape you have just pinned onto the other armhole and sweatshirt side, this ensures your dress is symmetrical.


Now use a ball point needle as your fabric is probably a bit stretchy and a stretch stitch on your sewing machine and turn your armhole raw edges over 1/4 inch from the right side to the wrong side and sew all the way around both armholes 


Now sew on both sides of your sweatshirt following your guidelines you pinned earlier , a line of stitches starting at the armhole and following your line along to the side seam.
Do not cut this yet


Try the dress on the child first before any of this snippy snippy business, once you have cut it there is no going back, remember measure twice cut once.
Once you are happy that your dress fits then cut the excess fabric off the side where you have just sewn, leave about an 1/8 inch excess fabric next to your stitches and zig zag with a small zig zag stitch to neaten the edges .

And you have an easy 20 minute upcycled little girls dress.


Tuesday, April 01, 2014

Hair accessory organiser, DIY tutorial

Do you have lots of hair accessories and don't know what to do with them ? My daughter certainly has, and since she is only 5 it is unfair to expect her to keep all the masses of hair clips and bows and bobbles tidy herself without a little help , they were stored like this. Not the greatest organisation.


Do you remember the jewellery organiser I made ?, following along those lines and with recycling bits and bobs in mind , I decided to make a hair accessory organiser in a similar way , have a look below to see what I came up with.


Looks great doesn't it ? perfect to organise hair clips and ponytail holders and cost pennies to do.

If you want to make one of your own follow along with me.

Supplies you will need the following

Ribbon odds and ends each piece needs to be long enough to span the length of your frame plus 1 1/2 inches
A wooden picture frame, it must be wooden for this project (I bought one 2nd hand for £1)
Small screw in hooks from a hardware store
A heavy duty staple gun or hot glue gun.

Now gather all your supplies together and we are ready to get started .


First of all we don't need the picture or the board or the glass in the frame, I used a craft knife to run all along the back of the frame to cut the tape holding it all together and used pliers to pull up the funny little metal clips that fold over to keep it all in place, (I am sure they must have a name, please let me know if you know)
Word of warning if your frame hangs by string on the back like mine, make sure you don't cut it, you still need something to hang your frame with.

Don't throw your glass or board away these are useful for other projects.


Also you don't need the metal clips so you can pull them out altogether, I used pliers.

You will now have an empty picture frame as shown below, hopefully yours won't come with the little added extra mine did.


If you want to paint your frame you need to do it now as the ribbon will go over the edge of the frame.

Next you need to grab some ribbon, you want a reasonably wide ribbon mine was about  1 1/2 inches wide and wrap the ribbon over the top of the frame from one end to the other . The frame needs to be the way up it will be when it is hanging , so the ribbon will be vertical on the wall.

Make sure if you have a string hanger like mine you go over the string with the ribbon not under.


Using your heavy duty staple gun or glue gun attach the ribbon to the underside of the frame , making sure it is taut, I attached my ribbon about 1 inch away from the edge of the frame.


Keep attaching more ribbons leaving them about an inch apart for getting hair clips in and out.


You will now have a frame full of ribbons, so the hair clip organising is sorted , so what about the ponytail holders I hear you say ? Read on to find out .


Remember I mentioned you would need screw in hooks , these are for the ponytail holders , you just screw them into the bottom of your picture frame , using pliers if you have them is probably easiest.
I used the hooks I had at the time , but will be swapping them to larger plastic coated ones next week that will probably be less fiddly for little fingers.


And there you have it a simple cheap, pretty and effective hair accessories organiser, these are great for your home and great to make as gifts for birthdays or Christmas , you could easily jazz them up more decorating the frame with buttons , adding them after the ribbon is attached , or adding bows and embelishments they can be as plain or as funky as you like.


Tuesday, March 18, 2014

Card Wallet Free Easy Sewing Tutorial

First of all I want to apologise for not posting as regularly as I should , I have been working on my Etsy shop
retaking photographs, improving my seo (searchability on and off Etsy) and working on a new product line , and something had to give, unfortunately it was the blog. So I have come to the decision that instead of trying to post once a week and failing miserably, I will aim to post twice a month and make it count, although if something exciting comes up in between , I will post it .

So what is this new product line I here you say ........................................................
I talked about in my last post here about finding focus and getting my sewing mojo back , this new product line is part of this. I love love love sewing and I love love love designing and working with numbers figuring out the dimensions and construction for putting a purse or wallet or bag or dress together, so I have decided to combine both of my loves and start a line of digital downloadable sewing patterns in pdf format.
I make the items in my Etsy shop from scratch , figuring out a pattern and how best to put it together so this seemed like the next logical step, but please be patient these sewing patterns are not just thrown together they take time to design the item, work out how best to make it, photographing as I go, tweaking where necessary and writing up detailed step by step instructions, so rest assured I am working on them, they just take time to put the sewing patterns together.

To celebrate the start of the new line I thought I would share an easy free sewing tutorial to make a fabric card wallet, and here is the card wallet


 To make this card wallet you will need the following

A piece of medium weight cotton fabric at least 10 inches x 19 inches
A piece of medium weight interfacing, fusible or sew in
A scrap of fabric for heart on the front medium weight cotton approx 4 inches x 3 inches
A sheet of A4 paper
Pencil
A 2 inch piece of  self adhesive hook and loop tape

You will need to start by drawing out your pattern piece on your paper, please note for patterns sold in my Etsy shop you will not need to do this , you will receive a digitized sewing pattern to print but due to not having the capabilities on this blog to offer you a downloadable pattern I will guide you through drawing it out, it is simple so please don't be put off at this stage. Here we go then .................


 Now you have your paper pattern pieces all ready I will refer to the house shaped pattern piece as
"Body A" , you are ready to start cutting your fabrics, you will need to cut the following by pinning your paper pattern pieces to the fabric and cutting around.
You will need
 1 x heart from your paper heart shape, use your small scrap of fabric for this
2 x pieces of fabric and 2 x interfacing pieces using "Body A" as a template


If you are using fusible interfacing fuse it to the back of your larger pieces of fabric now following manufacturers instructions, if you are using sew in then I will explain further on what you are doing with this.

Next step is to attach our heart fabric to the flap of the card wallet, if you are using sew in interfacing, gather one piece of this and one of your "Body A" pieces of fabric and layer them sew in interfacing down first, then "Body A" fabric on top and then your heart on top , with the point of your heart base lined up with the point on your "Body A" fabric and pin in place, you now need to set your stitch on your sewing machine to a small zig zag stitch and slowly stitch around the edge of your heart enclosing the raw edge of the heart , you can see this in the photograph below.


                                           The finished result will look something like this.


Next we are going to make a card wallet sandwich, place your other "Body A" face down on top of the one we have just sewn and if using sew in interfacing place this on top.

Line up all your edges and pin through all the layers , notice on the shorter flat edge two pins are placed in opposite directions to the others these are placed approximately 3 inches apart and are our marker pins.

Now you need to sew using a straight stitch using 3//8 inch seam allowance starting at one marker pin and ending at the other all the way around our pinned together wallet pieces. You will be left with an approximately 3 inch gap , this is fine , I will explain this in a minute.


 To make nice sharp corners on our wallet you need to clip the corners of the fabric this reduces bulk in the corners , clip close to the corners but be careful not to clip your stitches.


Next you need to turn your wallet right side out, reach in the gap and pull your wallet right side out through the gap, and poke out the corners using your fingers or a pencil.
Sew a stitch line 1/8 inch seam allowance across the open straight edge ensuring the raw edges are tucked inside the wallet.

Fold this flat edge you have just sewn up 3 1/2 inches towards the triangle end of the wallet  ensuring your wallet is all square, lining up your side seams, you don't want a wonky wallet , when you have done so well so far. Pin in in place.
You now need to sew using a straight stitch and a 1/8 inch seam allowance all the way around your wallet , start from a bottom folded corner , sewing through all layers then along your bottom, up the side around the triangle and back again.


You now need to press your wallet shut with an iron , folding the flap shut , this will help keep it's shape, now just to add the self adhesive hook and loop tape, place one side on your wallet flap, do this first then line up your other side of hook and loop tape on the front of your wallet to form a closure and your wallet is finished.


I hope you enjoyed this tutorial , and look out for more sewing patterns/tutorials in my Etsy Shop

And a sneak preview , I have just finished writing up  and digitising the pattern for this wallet which is now available as an instant download in my Etsy shop

Wallet sewing pattern pdf

Wallet sewing pattern pdf

LinkWithin

Related Posts Plugin for WordPress, Blogger...