

To make a similar pin cushion you will need the following
Scissors
Paper
Pencil/pen
Empty plastic pot
Scraps of fabric
Scraps of felt
lace trim (optional)
Scraps of quilt wadding or cushion stuffing (cheap option buy a really cheap cushion pad and use stuffing)
Hot glue gun
Gather your supplies and give your pot a good clean out and dry it, my pot was pre clean out , I was just loving the coconut smell at that point.

Use your pot base and lid to draw round and cut two pieces of felt in a circle , one for the base (mine was yellow) and one for the top, I used white for mine.


Put these felt circles to one side for the time being.
Next measure the diameter of your pot lid mine was (7cms).
For those that left school a long time ago like me, the diameter is the measurement from one side of the circle to the other crossing the centre point.
You now need to draw a circle on your paper that is approximately 2 1/2 times the diameter of your pot lid, you can use a compass or like me you couldn't find it , I used a plate to draw around.

Cut your paper circle out

Yep my paper looks greasy, I used a bit the kids had grabbed with crisp fingers , waste not want not.
Fold your cut out circle in half, half again and half again , I have drawn on this one to show you where your fold lines will be, your circle will be divided into eight equal sections.

Fold your paper circle up again and use it as a template to cut out eight fabric shapes
Use different fabrics .

Now place one fabric piece on top of the other right sides facing and sew along the straight edge using a 1/4 inch seam allowance.

Carry on and do this for all eight fabric circle segments and you will end up with a circle with a gap this is fine.

Next sew your two open edges together again right sides facing 1/4 inch seam allowance and sew slightly past the centre to make sure you have no hole in the centre, your fabric circle will be domed a bit like a bra cup, this is all good.

Turn your fabric circle over wrong side facing you and grab a needle and thread and sew a running stitch all the way around the outside.

Pull on one end of your stitches and gather it all together but leave a gap because we still need to add the stuffing.

Grab your quilt wadding or toy stuffing and stuff it in the gap to poof out your fabric circle, you want it quite firm so get as much in as you can.

When you have stuffed as much as you can, pull your threads tight and knot together trapping your stuffing in there.

I sewed a strip of lace edging around my felt circle for the pot lid , this is up to you if you want to add it or not.

Now grab your hot glue gun

And glue your felt circle for the lid and glue it down to the pot lid.
And glue your poofy stuffed circle of fabrics on top of the felt , gathered side down , press hard , you want it to sort of mushroom out a bit.

Glue your felt circle for your pot bottom into the bottom of your pot, sorry I forgot to take a shot of this .
I also glued a strip around the edge of my pot bottom from bias binding to jazz it up a bit, and there you have it a pincushion and sewing needle pot combo.
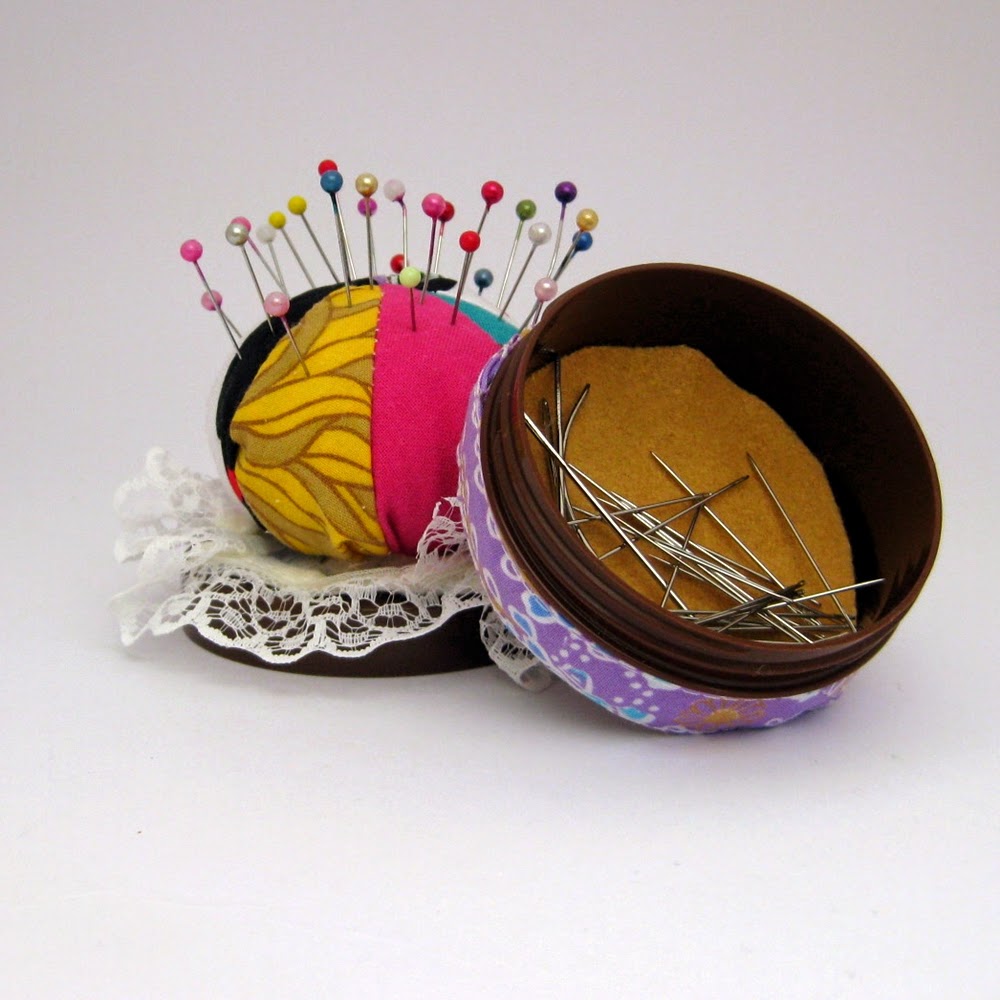
I hope you enjoyed this tutorial , if you enjoyed this you will love my sewing tutorials in my Etsy shop, if you can't be bothered making a purse, or bag or zip pouch and would like someone else to do all the hard work , I got that covered too, you can buy premade fabric gifts
See you all soon .