Tuesday, August 27, 2013

Easy Peasy Cherub Upcycling

At the minute we are thinking of redecorating our bedroom, I want a colour scheme of red and silver, so with this in mind I am keeping my eyes open for materials that can be recycled to fit the scheme or will go with the scheme I have in mind. I currently already have a few cherub items that I have collected over the years, that will go perfectly with the bedroom scheme I have in mind.
On Sunday at a local car boot sale I found the following cherub plaques
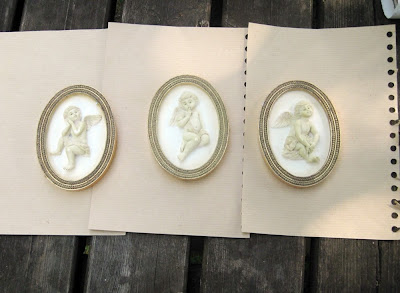
Cherub decorations
Original cherub decorations

As you can see they are not silver or red, but they were solid undamaged, easy to hang and just what I was looking for apart from the colour, and they were only One Pound for the three, so out came my trusty plastikote silver spray paint , apply liberally and you have

Upcycled cherub decorations
Finished upcycled cherub decorations


A little tip with the paint, it is better to spray a few light coverings than one heavy one, you will get better non runny coverage this way.

The three silver cherub plaques will fit in perfectly in my new bedroom scheme now.
A lot of my moneysaving comes from pre planning, I am collecting items for my new bedroom scheme now to decorate in a couple of months, I also want to redecorate the lounge so I will keep my eye out for the next couple of months for paint and items for the room. Always look at a piece of furniture or ornament with creative eyes and ask yourself is it Ok as it is ? can I change it or add to it for it to be what I want or need it to be ?.
Plan ahead to avoid I need it now scenarios, I buy Christmas cards and wrapping paper in January, I make and buy presents for Christmas and birthdays all year round, I have two spare pairs of oven gloves for when mine are ruined again because they were in the sale, I buy lunchboxes when they are on sale for when the children ruin their current ones, plan plan plan !!
Planning ahead will save you time , money and stress, so will upcycling and recycling, embrace them both.

Tuesday, August 20, 2013

Creating memories in a jar tutorial

Well we are heading towards the end of another six weeks school holiday and if your children are anything like mine they are collecting "things" everywhere they go, we have seashells and sticks to name but a few. To you and I they may just be junk but to the child that has collected them ,they are memories, memories of a place a time and people. If your anything like me you want your children to keep these items but it gets to a question of where to put them, our shells were on a bathroom shelf, but after 4 weeks the novelty of dusting fifty seashells is just about wearing thin, so I will share with you my solution "memories in a jar", it is a little craft project you can share with the children, that also involves my recycling so it is all good.


Memories in a jar tutorial supplies


You will need to gather your supplies :

Empty glass jar , coffee jar, jam jar , anything with a screw top lid
Silver spray paint (optional)
Small amount of ribbon (optional)
Memories (seashells, twigs, pinecones etc).

First clean you your jar and dry, if you have trouble getting the label off, try soaking it in hot soapy water for an hour or so. Next if you want to as I have done grab your silver spray paint to spray your jar lids, I only sprayed them because I had some left over from a previous project, as it can be quite expensive to buy. A thrifty tip look out for spray paints on discounted shelves in hardware stores as you can often get them cheaper as shop damaged stock with cracked lids, so if you see them buy them as I do for little craft projects.

Leave your jar lids to dry, go by the instructions on your paint. Fill your jar with your shells or pine cones or whatever memory object you are using , I also added some glass beads into mine that I found at a car boot sale, screw the top back on your jar and tie a little ribbon bow around the top if you are using any.


Finished memeories in a jar
Finished memories in a jar

I also had some shells that no matter how much ,mind over matter or manual manipulation I used they just would not fit into any of my jars, so I used these as tea light holders shown below

Seashell tealight holder

Waste not want not.

Until next time in enjoy your crafting and recycling

Tuesday, August 13, 2013

How to make a funky little rag wreath tutorial

I have a little project for you that can keep little fingers and big fingers busy ,you will need the following :

Scraps of fabric (How much depends on how big you want your wreath to be )
A steel hoop or coathanger to make into one, or you could use a ready made wicker one or even cut one out of stiff card
Scissors
Small length of ribbon to use as the hanger


First cut up some scraps of fabric , or recycle old clothes use whatever you have available , my hoop was approx. 4 1/2 inches in diameter so I cut my scraps 1 inch wide x approx. 7 inches long.

Fabric strips for rag wreath
Cut fabric strips for rag wreath

Grab your hoop, mine was part of a dream catcher set that was too complicated for my children to do, but you could use a coathanger and cut it carefully and re-shape it , or you could make a hoop from really thick card, it doesn't even have to be circular you could make it heart shaped , or if you are feeling really adventurous you could go for a star shape.
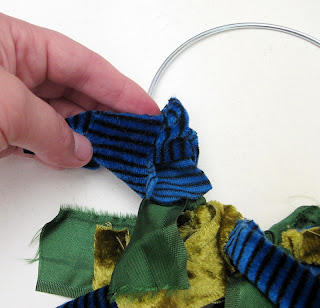
Grab a strip of fabric and tie it in a simple knot around the hoop, so that you have equal amounts of fabric either side of the knot with your fabric strips faced outwards and the knot on the inside of the hoop.

rag wreath tutorial
Rag wreath tutorial tying the fabric strips

And you just carry on doing the same thing over with more fabric strips ,pushing them together as you go


Rag wreath part way done
Rag wreath partway done

Some of the strips I am using on the blue and green area little un-uniform in length, I will see how I feel when I have finished this one but I may trim down some of the strips with scissors, it is your wreath so just go with the flow add in the colours you want and if the strips are a little long or straggly , just give them a haircut.

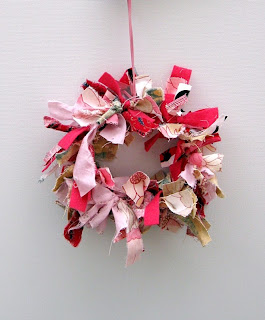
To finish off the wreath use a strip of cord or ribbon and knot it around the hoop to form a hanger to hang your wreath by.Here is a pink wreath I finished earlier

Finished pink rag wreath pink
Finished pink rag wreath


I would love to see any that you have made , so go mad make them in every colour , size and shape, and they are great to make with the kids , please do the cutting for younger ones to be safe and have fun :-)

Monday, August 05, 2013

The Martisanne household has just increased by three !!!

As the title says we have just increased our household by three, we are a household of 2 adults, 3 children, 10 chickens, numerous fish , mosquito lavae my son has caught and is growing in a sea monkey container, the daddy long legs that keeps walking across the television when I get to the interesting bit in a film, the occasional hair pets that come home from school, and now we have managed to squeeze in another three newcomers

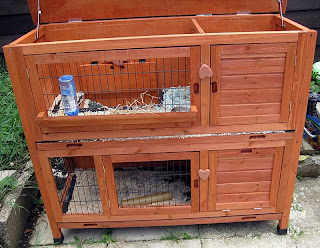
This is their home, can you guess who they are ?

Small animal hutch

Another clue

Guinea pig hutch

Have you guessed yet ?

Guinea pig

And a front view

Guinea pig front view

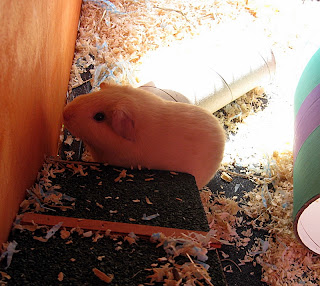
Have you got it yet , even though they keep trying to hide

Guinea pig

Yeeeeeeahhhhhhh you got it, we have three shiny new 7 week old guinea pigs


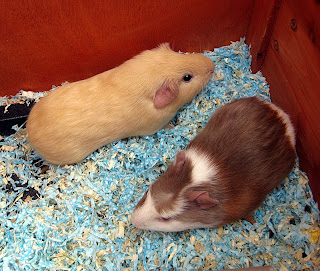
Pair of guinea pigs

Guinea pigs 7 weeks old


Yup cardboard tube for tea again

Guinea pig eating tea


We have 3 little boys, one cow print and two sandy coloured guinea pigs, promise we do have three even though I only seem to be able to get two in a shot at a time, we are all really excited about our new additions to the family, so much so that my daughter is insisting hers is a girl and has informed me that her guinea pig NEEDS a dress and you are allowed to put them in dresses and she will pick which fabric it will be made from, G-Force has a lot to answer for :-)

Before I sign off for this week I am having a little Summer coupon sale in my shop here feel free to come in and take a look around

Martisanne Etsy shop products


LinkWithin

Related Posts Plugin for WordPress, Blogger...