Tuesday, February 25, 2014

Getting back my sewing mojo and finding focus.

I have recently been making a few changes to Martisanne Handmade, if you follow my blog you will have seen in January , I redesigned logos and this blog to give it a whole new look you can read about it here.
Along with these changes I have been looking to focus my time and energies to be more efficient with my time to get results. I was trying to be all things to all people creating one off sewn items , which wasn't time or energy efficient, in doing this I felt I wasn't getting anywhere and had little to show for the time spent.
So I have taken a small step back researching what is selling in the market place but also wanting to stay true to my own designs not fighting for a place to stand out amongst 1000s of the same item.
In doing this I feel I have got my sewing mojo back I want to create and have found a way to be more productive and most importantly proud of what I have produced.
Firstly tackling the originality, as well as sewing I love to draw so have combined the two with these embroidered purses available here in my Etsy shop, there will be more of these unique purses to come.
I can cut them the boring bit, anyone who says they love cutting out fabric rectangles is lying , in multiples and have them ready to go when creative inspiration strikes.
Secondly I have for the time being removed items from my Zibbet shop, to allow me to focus in one area my Etsy Shop.

Now here is the really efficient bit that I am still working on but feeling really excited about .
Remember I said I want to be time and energy efficient but still creative and focused , well let me show you how this is going , check out the picture below.

Fabric_Swatches


Yep, she is showing me fabric rectangles I here you say, well these are not just fabric rectangles they are multifunctional rectangles that have inspired my creativity, it is not the fabric pattern but the size that has inspired me.
From one size of rectangle I can create various types of products and variations on a product.
Let me show you some examples so far .

Credit card holder
A credit card Wallet

Mini purse
Zippy wallet

Mini purse green fabric
Zippy wallet


The above are examples of items I have created from that rectangle of fabric, the purse may have zips and a magnetic snap and be folded in a different way , but the fabric pieces used to create it are the same size as the credit card holder.
This way I can be more productive cutting rectangles of fabric all ready , to make into what I fancy making that day.
I am also working on different variations, the zippy wallet could have an extra pocket on the front cutting a rectangle into thirds, it could have a wristlet strap cutting the rectangle longways and folding.

I think by narrowing my focus and options and thinking I only have this size of fabric to work with , I have actually forced myself to be more creative with less, weird isn't it how the mind works.
I am not saying I am never going to create anything that doesn't use the same fabric pieces, but I will use this method to focus my efforts and creativity.
You can keep an eye on my creative outpourings in my Etsy Shop


Tuesday, February 18, 2014

DIY photography light box tutorial

Recently I have been working on improving my Etsy shop, designing a new logo, working on tags and descriptions for my products, and the next stop on this journey is improving my photography. I have been reasonably pleased with my Etsy shop photographs , using an old white projection screen and white paper as a base, but was constrained by photo editing and time of day I could photograph , and with a family I need my time to be more fluid.
I researched various photography ideas and came to the conclusion a light box was the way to go, needing one big enough for cosmetic bags and larger and on a miniscule budget , and the need for it to fit nicely in my office, as is usual in the Martisanne household , we researched and decided to come up with our own version, the use of the Ikea table I have to say though was my lovely hubbys idea, whose sole mission in life is to make my life easier wherever possible.

The light box you will end up with following this tutorial will measure approximately 55cms x 55cms x 55cms, and if you follow the principal, you can really make one any size you need.
Firstly let me show you some examples below in the difference a light box will make, the rotary cutter light box photograph was taken at night curtains shut, only standard lighting in the room with a point and shoot digital camera , and just look how good it is.

Photograph_of_purse_in_light_box
And a proper daylight shot below , no editing and no additional light , just taken next to a window on a dreary rainy day.


You see how good a shot you can take without even trying.

For the light box you will need the following

1 x White (matt not gloss finish) Lack Ikea coffee table £5 in the UK 2014.
White fabric , not too thick test it to see if light will shine through, you want fabric that will let light through.
Lighting for your box 1 to 3 angle lamps or torches , you will need to experiment to see what works best.
Roll of Duct tape
1 sheet of white A1 size mounting card , mine was £2.99.

First grab your coffee table and ignore the assembly instructions.

Ikea Lack coffee table


Where the holes are on the underside of the table top drill through to the other side as below, repeat on all four corners.


Drilling coffee table legs
 
You will have four holes on the table top side but that is fine, it will be hidden

drill hole in coffee table
 
Screw the screw pegs in from the white side of the table opposite to what the instructions tell you, on all four corners of the table.

screwing screws in table
 Screw the legs into all four corners of the table top.

scfrew table legs in
 
You will end up with an upside down inside out coffee table.

lack_coffee_table
Now get your fabric, you will need to spread a piece of fabric, leg to leg and tape it to the outside of the table top and leg as below, you want your fabric pulled tight and you want to cover two opposite leg spaces doing this.

photography light box tutorial
 
And you will need to turn your table so that your table top is down flat and the space between all four of your table legs is where your roof will go, making sure you overlap the fabric with your two side pieces slightly to prevent gaps. I also as per the picture below created a fold in the fabric , which when attaching your fabric roof needs to be placed fold down , with the fold in the space between the legs , you can see a bit better in the next picture , the fold is at the front.

fold in roof fabric
 Roof attached to your light box and it is the right way up with the coffee table top down.
light box near completion
 
Next you need to place your A1 sheet of card carefully in your box trying not to crease it , push the short edge in first and place it in the slight fold you made in the roof fabric , to gently wedge it .
Next fold your card gently trying not to crease it, you don't want crease marks, by pushing it backward into the box, you want a gentle curve, so the card is flexed not folded and for the front end of your card to be resting against your table legs on the inside of the box at the front.
I had to cut a little square out of either side of mine probably about 1 1/2 inch x 1 1/2 inch to allow the card to sit around the table legs at the front, this will again wedge it in place.

diy photography light box


And you have a finished light box, place your item inside your box on the card and you can use angle poise lamps above the roof and torches at the sides of the box to create lighting, use what you have available and experiment with your camera.
And the finished light box is also relatively light for moving around, and I intend to use it outside in daylight when it finally stops raining.
 
The photo below used only daylight and a point and shoot digital camera.
 
I hope you enjoyed reading this , and it has given you some ideas to build on


Tuesday, February 11, 2014

Labels for homemade sewing projects tutorial

If you follow me on Instagram you will know that I have a brand new toy for my handmade projects, a customisable ink stamp, that my lovely hubby spotted at a table top sale brand new in the packet and suitable for textiles for the grand sum of 50p .
This is a little tutorial on how to make your own labels for your own homemade sewing projects.
You will need to gather the following,

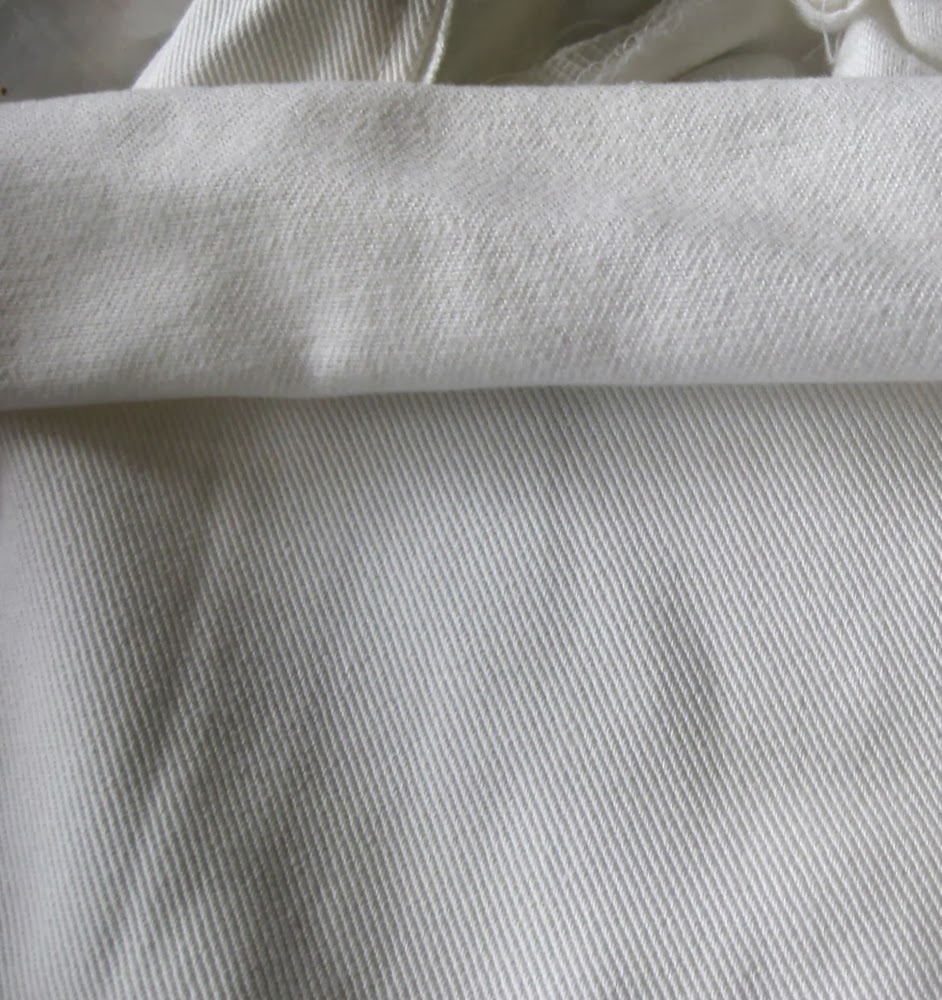
Fabric for your labels , I used a cream woven fabric, use what you have.
Scissors or rotary cutter
Ink stamp
Ruler , not essential but makes life easier
Sewing machine or needle and thread if hand sewing.


I will now take you through step by step how to create these lovely little sew in labels for homemade projects , they are quick, easy and economical give any project that more professional look whether your items at a craft fair or giving them as gifts.

Finished labels for homemade sewing projects


I was lucky enough to find a stamp that can be personalised, you arrange your tiny letters with tweezers on the rail on the stamp as shown below, remember it will all need spelling backwards.
The stamp I used stated it was suitable for textiles and washable up to 90 degrees, but if you are using it for projects that are not to be washed you could use a standard ink stamp, you may even find the ink isn't washable anyway and survives the wash, just experiment and see what works for you.
Personalised ink stamp
 
 
Once your stamp is set up you are ready to go, grab your fabric you are using to create your labels, mine is a cream woven fabric, but use what you have, an old pillowcase or shirt or sheet .
Then stamp away, try and stamp in rows , with the rows approximately 2cms apart and your stamps approximately 3cms apart, try and stamp in straight rows , you can see I went a bit wonky, do as I say not as I do. Also another tip is try and press reasonably hard with the stamp and with even pressure create an even print.


Ink stamped fabric
 
 
Next cut your labels into strips as below cutting halfway between the rows
 
 
Cut fabric label
 
 
Turn your row of stamps with the stamped piece of fabric facing away from you and sew with a straight stitch on your sewing machine if using one,  by folding the label over approximately half a centimetre toward the middle of the strip, do this along both long edges .  
 
 
sewing label hem
 
 
Nearly there , you now have a strip of labels all neatly hemmed,
you just need to cut using scissors or a rotary cutter, half way between the stamps to separate them.


sewn stamped label right side up


You then have sewing labels ready for any homemade project, the short edges of the labels will be raw and unhemmed on your labels but when you sew your label into your project you can turn the raw edges underneath the label and sew all around the label to sew your label into the project.
 
Another variation is to sew the raw edges down only leaving a loop which is handy for  clothes labelling.
 
 
Finished sewing labels


Tuesday, February 04, 2014

DIY How to make a vinyl record bowl

I thought I would share with you a really easy gift idea, that you can create for next to nothing, a vinyl record bowl for this you will need the following.

A vinyl record any size (the bigger your record the bigger your finished bowl will be)
Oven gloves
A conventional oven (Not a microwave)
Two oven proof bowls
A cookie tray/baking sheet


Making a vinyl record bowl
Gather your items together

Preheat your oven to 90 degrees Centigrade or 200 degrees Farenheit (DO NOT MIX THESE TEMPERATURES UP)

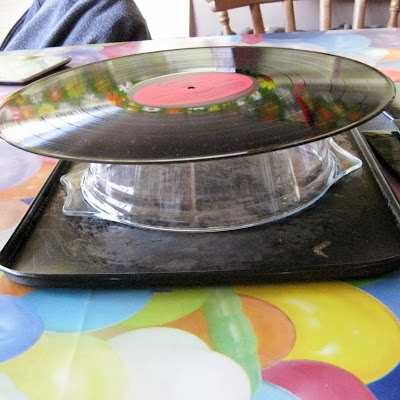
Place your cookie tray/baking sheet down , with your ovenproof bowl face down on top of it, and your vinyl record on top as below

vinyl record bowl tutorial
Balance your record on the bowl

Place your tray with bowl and vinyl record in the oven and set a timer for 5 minutes, while this is in the oven, get your oven gloves at the ready to take your tray out and get your second ovenproof bowl ready on a flat surface.

After 5 minutes your vinyl record will be floppy and hot but not melted in a puddle see below

Record bowl tutorial

You can give your vinyl record a few more minutes to heat up if it is not very floppy after 5 minutes.

Take the tray out of the oven using the oven gloves your tray and bowl will be very hot, then grab your floppy record with the oven gloves it should be malleable but not dripping, and push it into your second ovenproof bowl to push it into a bowl shape.

Vinyl record bowl diy

I actually used a third bowl to push it down into the second bowl, once you have placed your record into the second bowl from the oven, you should be able to handle it with your hands as it will be warm but not too hot, work quickly to shape your bowl as it will cool and harden very quickly.

If you are not happy with your finished bowl shape, repeat the process again, by heating it up and moulding it to shape. If you want to use the bowls for food purposes I would suggest painting them with a clear acrylic sealant of some type.

These bowls are great for anything, one such idea is if you are stuck for a gift for a hard to buy for man then use a 7 inch record and make a loose change pot, just one of a hundred uses for these crafty little bowls.

Making a vinyl record bowl


Last final tip, do check ebay or somewhere similar to make sure your vinyl record is not a rare collectable item worth hundreds of pounds before you go melting it into a bowl, they aren't worth so much curled up like a quaver.


LinkWithin

Related Posts Plugin for WordPress, Blogger...