Monday, April 28, 2014

Sewing patterns and sewing tutorials in my Etsy shop

I mentioned  previously that I was starting a new range of products at Martisanne Handmade, a range of downloadable sewing patterns.

Well I have been working on those, they are not an easy option , they take time , coming up with the design, trying it out to find the best measurements, the best way to construct the item and then after all that there is the photograph taking, the note making and the final write up of instructions and digitizing the actual pattern pieces.

As you can see a lot of hard work goes into one little inoffensive looking sewing pattern.

So why do I do it, why create sewing patterns , there are a number of reasons and this is by no means an exhaustive list, so here are 6 of my best.

1. The most obvious , so that I can sell them, I am a business and would  very much like one day to make a        profit.

2. I love sewing and would like to share that love for sewing with others in a non scary easy to follow way.

3. I mentioned I love sewing, yep I think you got that , but what I don't love sewing the same thing over and
    over.

4. I love creating new things, working out a new idea for a product this is time consuming, creating patterns
    is a way to make that time an investment.

5. I mentioned I need to create new products not just the same old same old, but when I have created them
    what do I do with the measurements I have on a scrappy bit of paper , my head isn't big enough to
    store them all so sewing patterns are a great way to force myself into a filing system

6. About those scrappy bits of paper, I also can't remember where I stuffed them so 5b really.

7. The real number 6 , I also love learning new skills ,in  creating these sewing patterns I taught myself to           digitize sewing patterns using Inkscape , so yay a new skill under the belt .

So as you can see they may be time consuming, but there is a lot of benefit to be had from creating these little sewing patterns, and I will remind myself of this next time I am on page 15 writing a sewing pattern and I feel like my eyeballs are falling out.

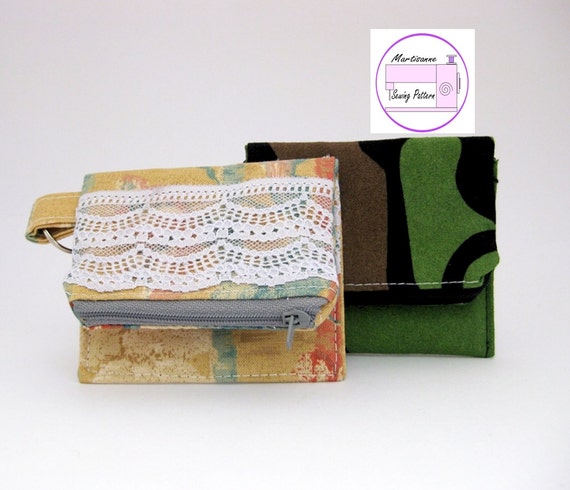
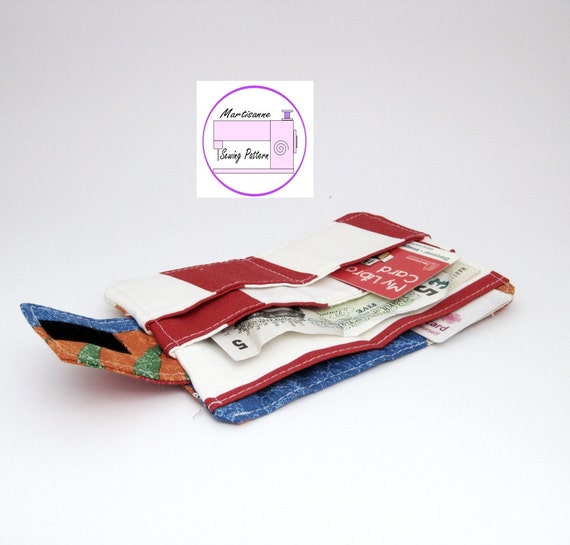
I will leave you with a snap shot of my Etsy shop , with the sewing patterns already available, remember they are instant download so no postage fees and no waiting for them to arrive so instant gratification.


Tuesday, April 15, 2014

Upcycling clothes, a sweatshirt to a little girls dress tutorial

Whilst browsing a local charity shop a few weeks ago , I came across a "Daisy Duck" sweatshirt for 25p , perfect for my little girl except that it was an age 11 yrs not age 5 yrs. Not wanting this bargain to get away I bought it anyway and set about upcycling it from a lovely sweatshirt to a little girls dress.
Here is the tutorial on how I did it to give you ideas on how you too can upcycle clothes easily and cheaply.


First grab your sweatshirt 


Use your seam ripper to de-tatch the sleeves 


Next grab your child that the dress needs to fit and place the de-armed sweatshirt over their head inside out as though it were a dress already.

Carefully place pins along one side of the sweatshirt to pin the sides of the sweatshirt to narrow them where neccessary to create a dress shape rather than a sack , also pin the armhole to create a smaller gap but make sure your child can still comfortably get their arm in and out of the armhole.
You may need to take the armholes in as well but I didn't need to for mine. If you need to use the same principle as for the dress sides pin in place but allow an extra 1/4 inch seam allowance for hemming the armholes. 
Either cover your hands over the pins to prevent them sticking in the child when you remove the sweatshirt or draw a line where your pins are and remove them first.
Ignore my drawn line below I changed my mind on the sizing before sewing.


Fold your sweatshirt down the middle and trace your dress shape you have just pinned onto the other armhole and sweatshirt side, this ensures your dress is symmetrical.


Now use a ball point needle as your fabric is probably a bit stretchy and a stretch stitch on your sewing machine and turn your armhole raw edges over 1/4 inch from the right side to the wrong side and sew all the way around both armholes 


Now sew on both sides of your sweatshirt following your guidelines you pinned earlier , a line of stitches starting at the armhole and following your line along to the side seam.
Do not cut this yet


Try the dress on the child first before any of this snippy snippy business, once you have cut it there is no going back, remember measure twice cut once.
Once you are happy that your dress fits then cut the excess fabric off the side where you have just sewn, leave about an 1/8 inch excess fabric next to your stitches and zig zag with a small zig zag stitch to neaten the edges .

And you have an easy 20 minute upcycled little girls dress.


Tuesday, April 01, 2014

Hair accessory organiser, DIY tutorial

Do you have lots of hair accessories and don't know what to do with them ? My daughter certainly has, and since she is only 5 it is unfair to expect her to keep all the masses of hair clips and bows and bobbles tidy herself without a little help , they were stored like this. Not the greatest organisation.


Do you remember the jewellery organiser I made ?, following along those lines and with recycling bits and bobs in mind , I decided to make a hair accessory organiser in a similar way , have a look below to see what I came up with.


Looks great doesn't it ? perfect to organise hair clips and ponytail holders and cost pennies to do.

If you want to make one of your own follow along with me.

Supplies you will need the following

Ribbon odds and ends each piece needs to be long enough to span the length of your frame plus 1 1/2 inches
A wooden picture frame, it must be wooden for this project (I bought one 2nd hand for £1)
Small screw in hooks from a hardware store
A heavy duty staple gun or hot glue gun.

Now gather all your supplies together and we are ready to get started .


First of all we don't need the picture or the board or the glass in the frame, I used a craft knife to run all along the back of the frame to cut the tape holding it all together and used pliers to pull up the funny little metal clips that fold over to keep it all in place, (I am sure they must have a name, please let me know if you know)
Word of warning if your frame hangs by string on the back like mine, make sure you don't cut it, you still need something to hang your frame with.

Don't throw your glass or board away these are useful for other projects.


Also you don't need the metal clips so you can pull them out altogether, I used pliers.

You will now have an empty picture frame as shown below, hopefully yours won't come with the little added extra mine did.


If you want to paint your frame you need to do it now as the ribbon will go over the edge of the frame.

Next you need to grab some ribbon, you want a reasonably wide ribbon mine was about  1 1/2 inches wide and wrap the ribbon over the top of the frame from one end to the other . The frame needs to be the way up it will be when it is hanging , so the ribbon will be vertical on the wall.

Make sure if you have a string hanger like mine you go over the string with the ribbon not under.


Using your heavy duty staple gun or glue gun attach the ribbon to the underside of the frame , making sure it is taut, I attached my ribbon about 1 inch away from the edge of the frame.


Keep attaching more ribbons leaving them about an inch apart for getting hair clips in and out.


You will now have a frame full of ribbons, so the hair clip organising is sorted , so what about the ponytail holders I hear you say ? Read on to find out .


Remember I mentioned you would need screw in hooks , these are for the ponytail holders , you just screw them into the bottom of your picture frame , using pliers if you have them is probably easiest.
I used the hooks I had at the time , but will be swapping them to larger plastic coated ones next week that will probably be less fiddly for little fingers.


And there you have it a simple cheap, pretty and effective hair accessories organiser, these are great for your home and great to make as gifts for birthdays or Christmas , you could easily jazz them up more decorating the frame with buttons , adding them after the ribbon is attached , or adding bows and embelishments they can be as plain or as funky as you like.


LinkWithin

Related Posts Plugin for WordPress, Blogger...